Configuring Fastmail to Work Like Hey
If all you care about is seeing how I set everything up, go to the Setup section below.
I almost exclusively use my email for receiving, not sending. I tried and loved using Hey when it first released, as did a lot of people, but it's not cheap at $100/yr, and DHH is a problematic figure to say the least.
Enter Fastmail
While its UI may not be as modern and bubbly as Hey, Fastmail is significantly more functional while still managing to look like it is from this decade. It has powerful, but simple filtering rules and supports sieve scripting for power users.
Additionally, it is missing some of the quirks of Hey (why can't I import old emails into Hey??) and allows up to 100 domains per account with effectively unlimited sending addresses for free. That last bit is something that, as far as I'm aware, no other email provider offers. Most that I'm aware of limit you to 3 or so custom domains per account.
Fastmail does not offer end to end encryption. However, I honestly don't think that matters very much. For any secure communication, I'll be using Signal. Besides, since I'm mostly receiving automated email, the sender on the other end is likely using services like Mailgun, Sendgrid, or Gmail anyways.
And no, I'm not affiliated with Fastmail whatsoever. I'm just a satisfied customer.
Anyways, enough about Fastmail themselves. Time to configure it!
Setup
I'll assume that you already know how Hey works. If not, check out their sales pitch on their website, then come back here.
The core functionality here bubbles down to Fastmail's ability to create contact groups and to filter emails based on which group a sender is in. For a quick and dirty recreation:
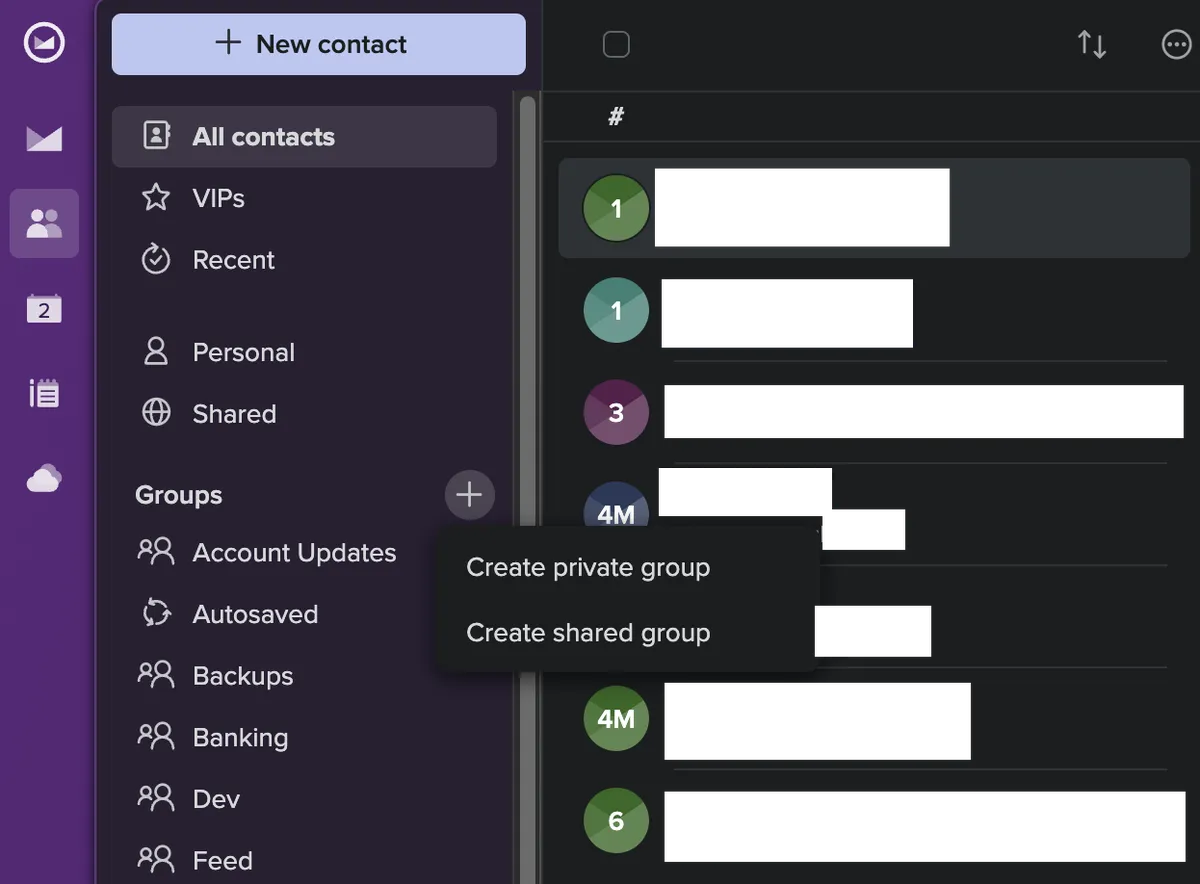
- Go to the contacts page in Fastmail and create two new contact groups: Paper Trail and Feed.
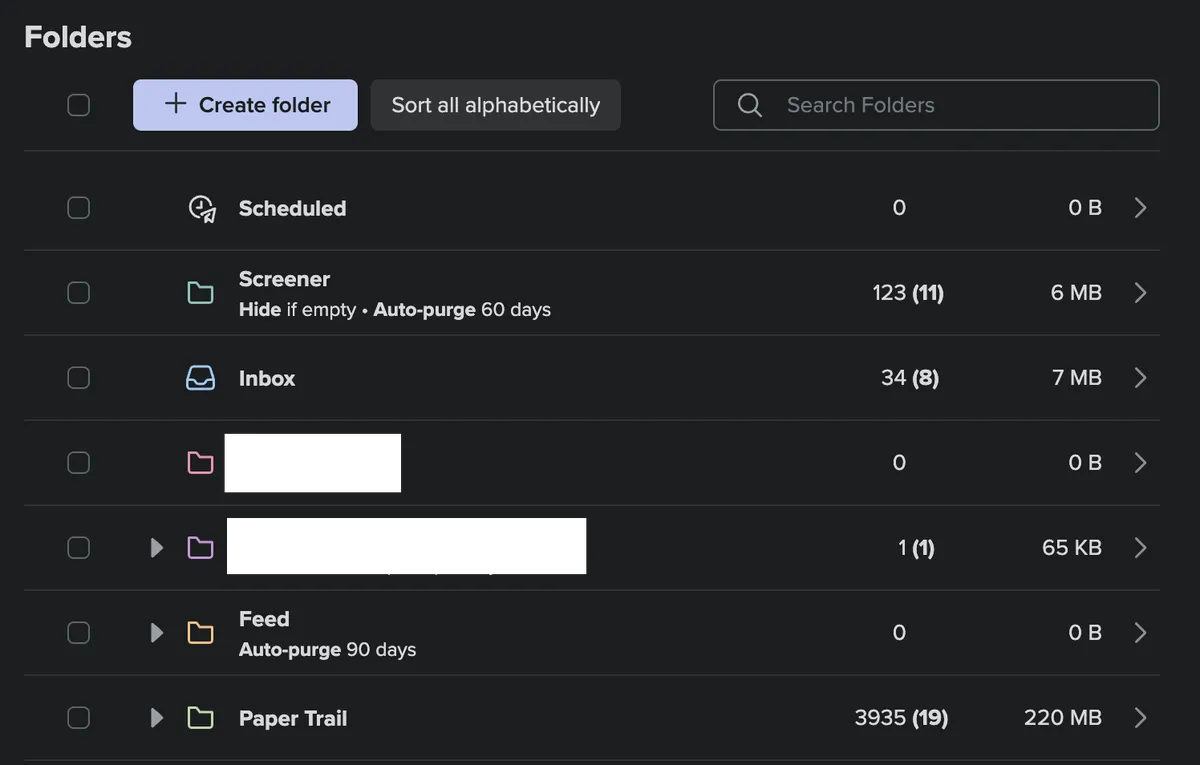
- Go to Settings > Folders and create three new folders: Screener, Paper Trail, and Feed.
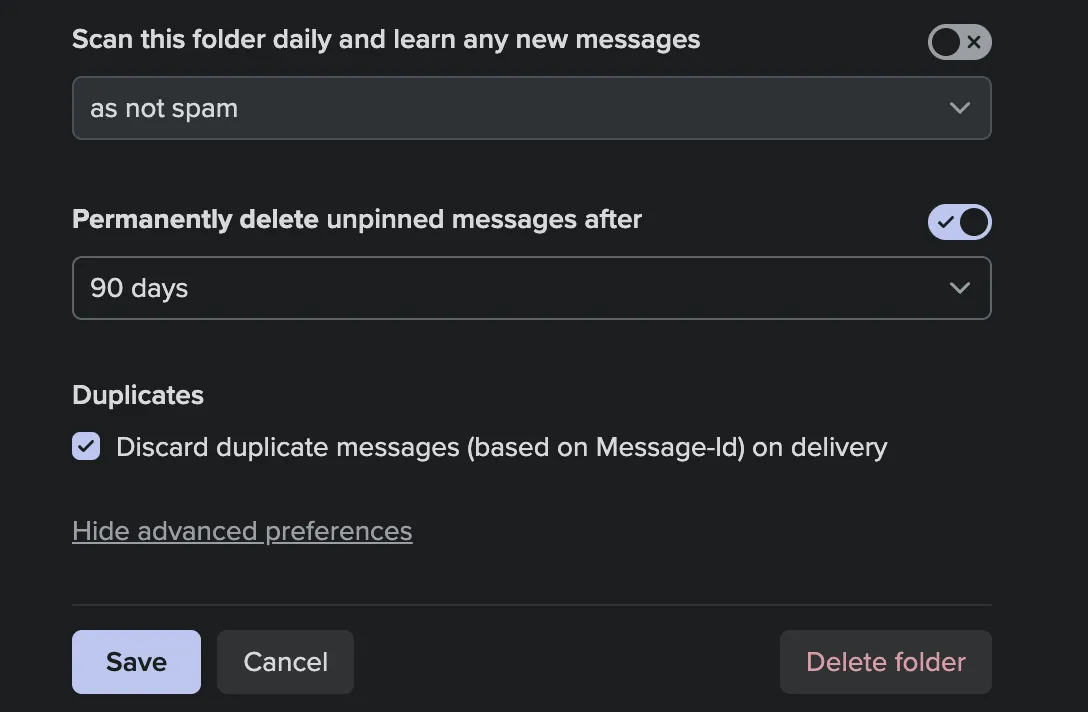
- From the folder settings menu, click on Feed > Show advanced preferences and scroll down to enable "Permanently delete unpinned messages after". I have mine set to 90 days, but you can tweak it to your preference.
Optionally, you can repeat this step for the Screener and Paper Trail if you'd like. I have my Paper Trail set to never delete though.
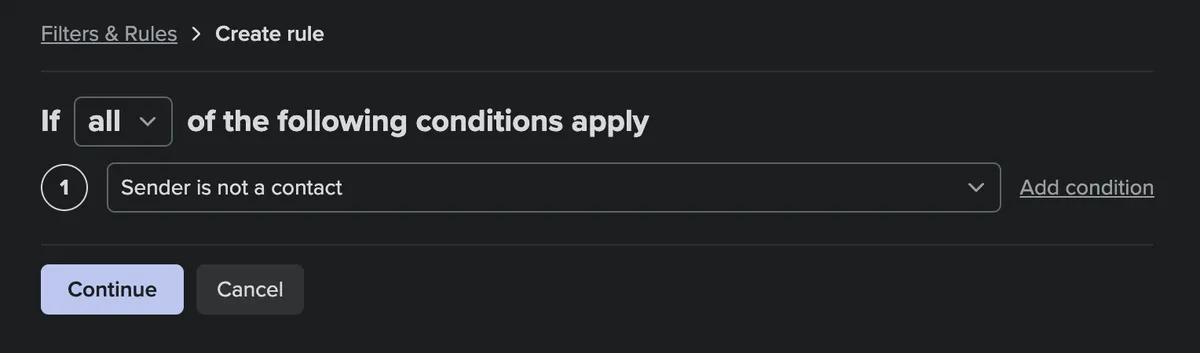
Go to Settings > Filters & Rules > Create Rule. The next few steps will take place in here.
Set it to if
allof the following conditions apply, then set the only condition to be if the sender is not a contact. Select Continue > Create rule.
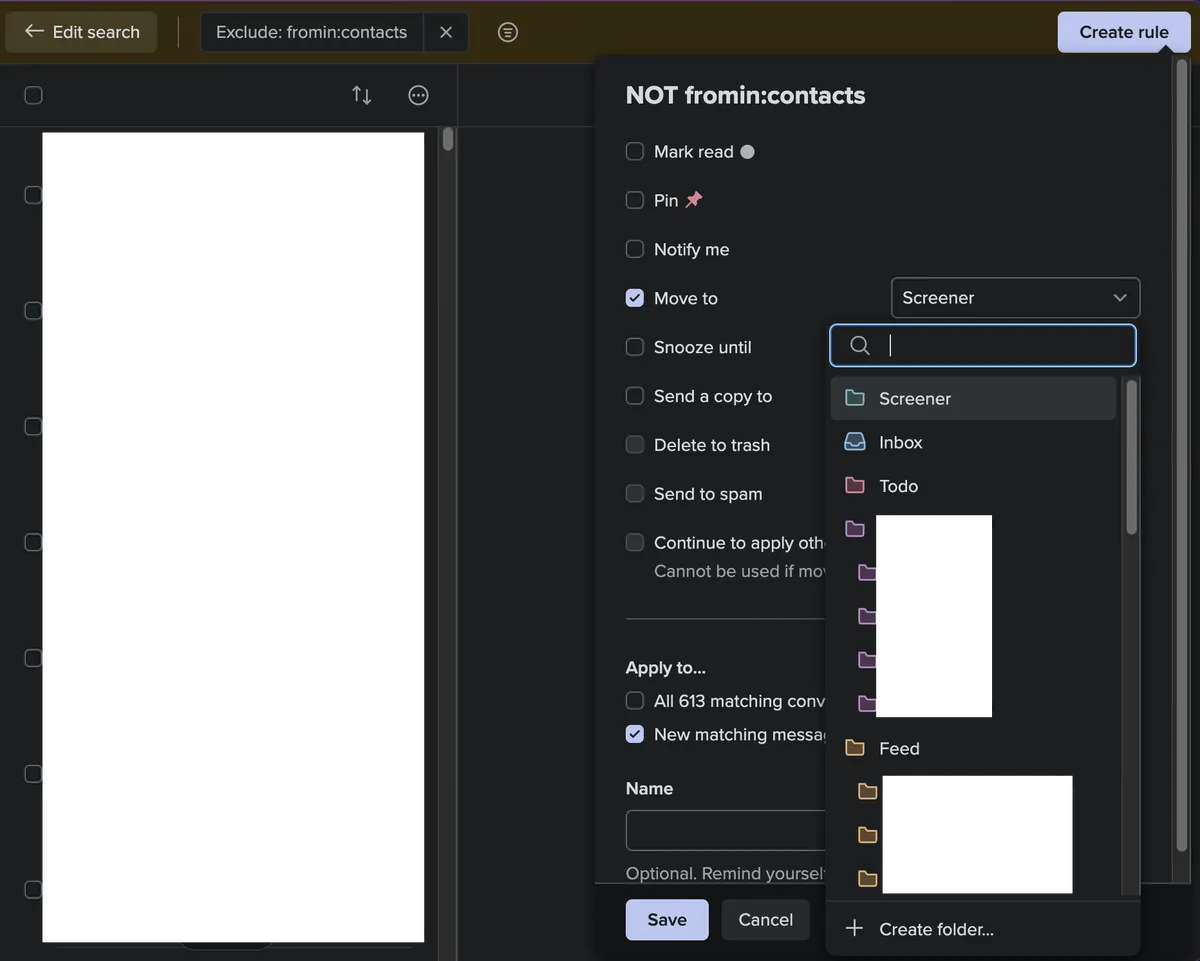
- Check the "Move to" checkbox, then select the "Screener" folder in the dropdown next to it and click "Save". I have notifications for this category disabled, but you could choose to enable it if you'd like.
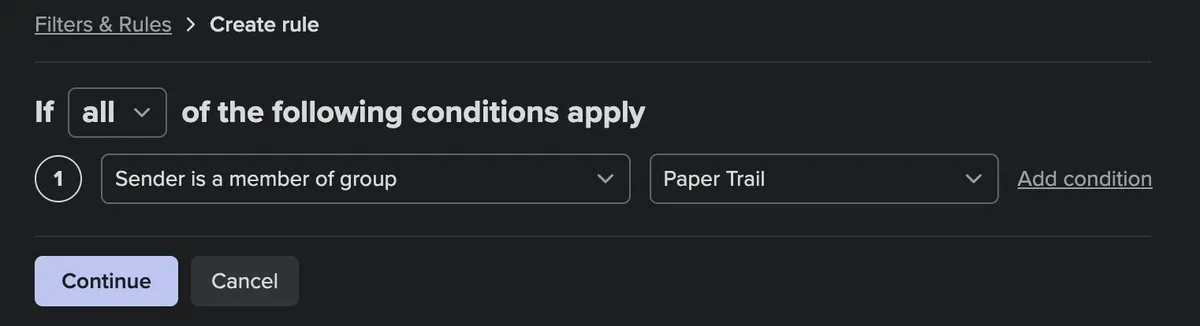
- Create another filtering rule, but this time change the condition to "Sender is a member of group" and select the Paper Trail group we created in step 1. Again, select Continue > Create rule.
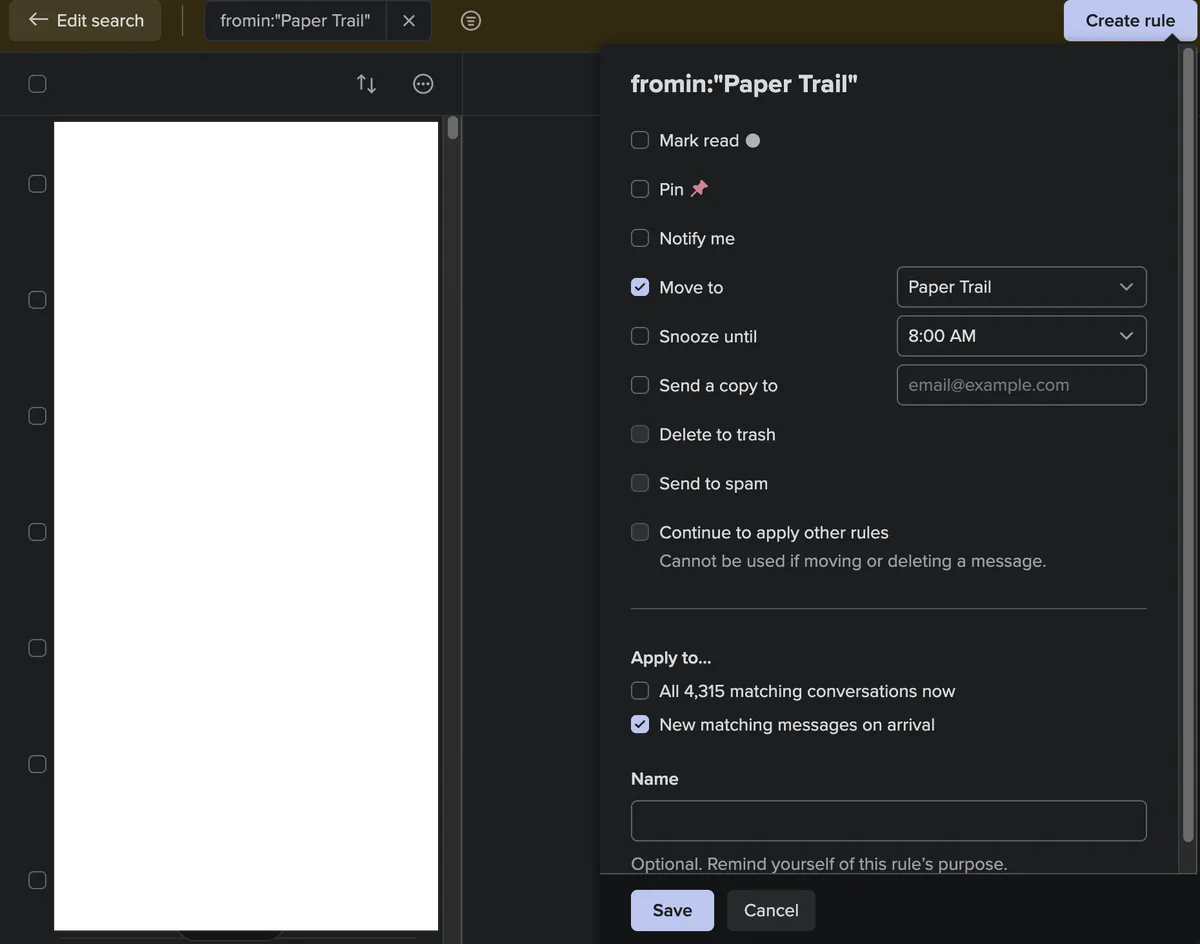
- Just like the previous rule, check the "Move to" checkbox, then select the Paper Trail folder in the dropdown, and click "Save".
- Lastly, repeat step 6 and 7, just swapping out "Paper Trail" for "Feed".
Configuration done! Now, it's time to learn how to use it.
Usage
When we first get an email from a new sender, our Screener rule will send it to the Screener folder without notifying us. We will still be able to see a total unread count in the side bar though.
When screening a new sender, we have a few options:
- Block them. Their future emails will go straight to the trash and we never have to think about them again.
- Add them to our contacts, but not a contact group. In this case, none of our rules apply, so the email will go to our inbox like normal, and we will get a notification. This is reserved for real people, or time-sensitive emails.
- Add them to the Paper Trail contact group. These are receipts from online shopping, subscriptions, and the like. They're not time-sensitive, but they are nice to have.
- Add them to the Feed contact group. These are newsletters, passwords resets, and things like that. Nice to have around, but not urgent or needed for ever.
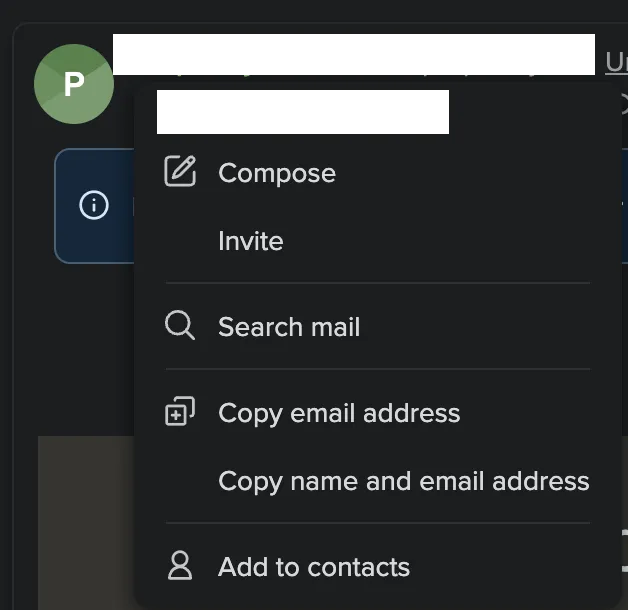
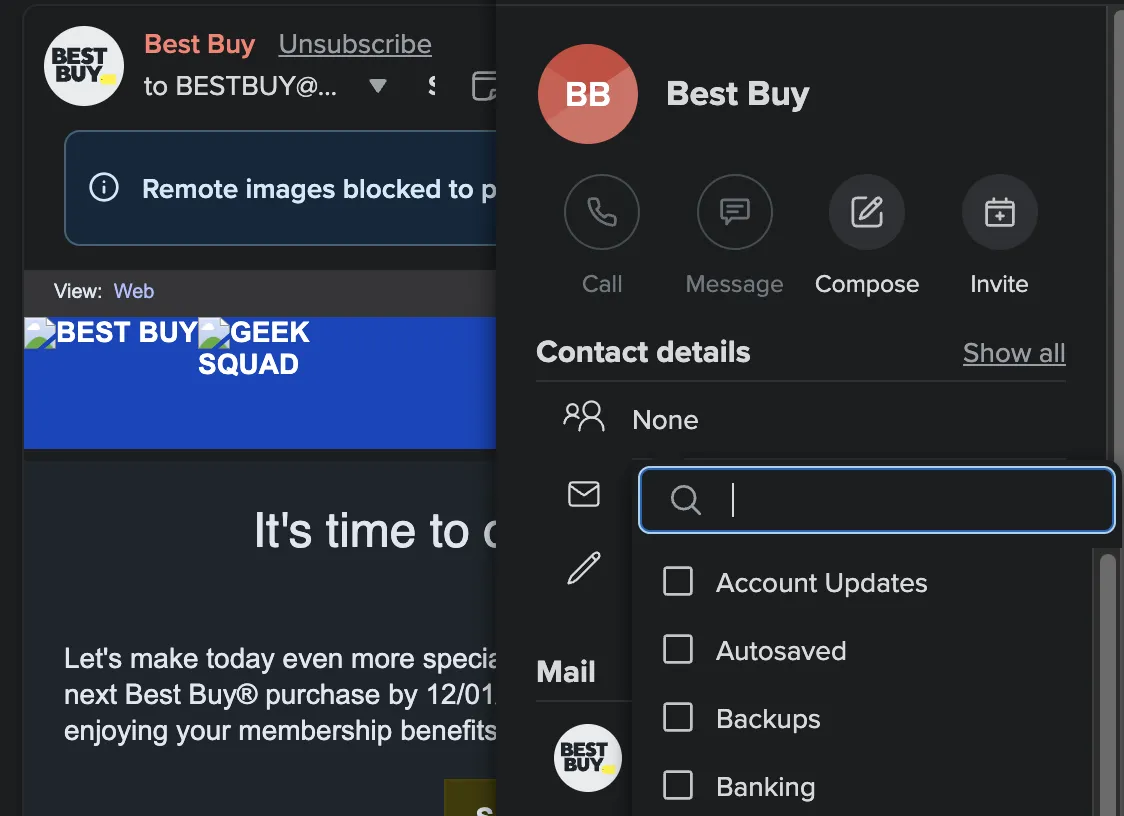
To do this in the Screener, click on the profile icon of a sender and select "Add to contacts", then select "View contact" on the small popup that appears at the bottom of the screen.
Then, click the contact group box and select a group to add the contact to. Going forward, our new mail rules will move any new emails from this sender into the appropriate folder.
Lastly, you can move the email out of the Screener and into the appropriate folder.
This process does take a bit of getting used to. However, once you get in the swing of things, it's a dream.